
Staining a Redwood Deck: Everything You Need to Know
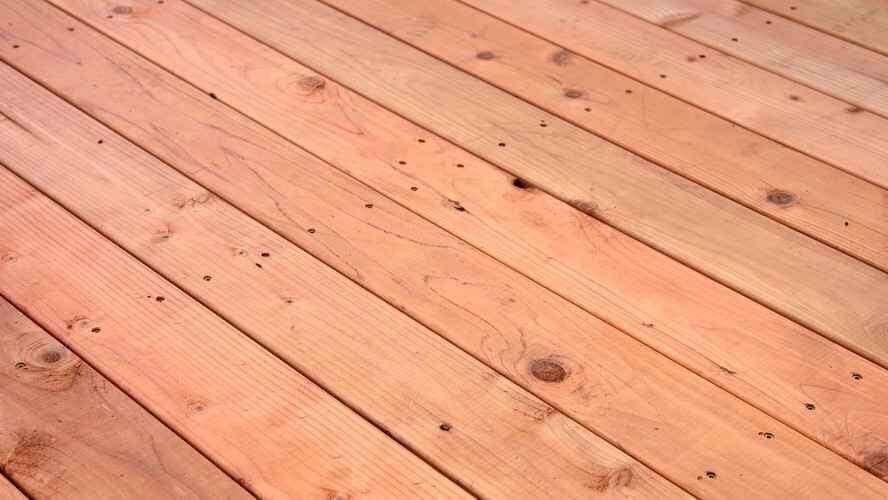
Redwood decks bring natural beauty and durability to any home, but even this robust wood needs care against the elements. If you want to rejuvenate your outdoor space, staining a redwood deck is key to maintaining its charm and making it a stunning focal point for years.
While redwood resists rot, it’s vulnerable to sun, rain, and temperature, which cause fading and degradation. A quality deck stain for redwood not only enhances its natural look but also provides vital protection, significantly extending your deck’s lifespan. Let’s get started on making your redwood stained deck truly shine!
Article Contents
Preparing Your Redwood Deck for Staining
Before you even think about cracking open that can of redwood stain, proper preparation is absolutely paramount. Think of it as laying the groundwork for a masterpiece – you wouldn’t paint on a dirty canvas, would you?
First, clear your deck of all furniture, planters, and any other items. If there are adjacent surfaces like windows, concrete, or plants, cover them with plastic sheeting to protect them from drips and overspray.
The most crucial step is a thorough cleaning. You’ll want to remove all dirt, grime, mildew, and old, flaky finish.
- Initial Rinse and Cleaner Application: Start by wetting down your entire deck with a garden hose. Then, apply a dedicated wood deck cleaner. Many professional-grade cleaners come concentrated and require mixing with water (a common ratio is 4 parts water to 1 part cleaner). Use a stiff-bristled deck brush – avoid wire brushes or steel wool, as metal particles can embed in the wood and cause staining – to scrub the cleaner into the wood.
- Dwell Time and Keeping it Wet: Let the cleaner sit on the deck for about 10–15 minutes, allowing it to work its magic. Here’s a crucial tip: never let the cleaner dry on the wood! Keep the surface consistently wet with a light mist from your hose to prevent streaking and ensure maximum efficacy.
- Pressure Washing: After the dwell time, it’s time to rinse. A pressure washer is highly effective here, but use it with caution. The goal is to rinse off the cleaner and loosened debris, not to strip the wood or damage its fibres. Keep the nozzle moving, maintain a safe distance (around 8–12 inches), and use a wide fan tip to avoid creating marks.
- Brightening for That Fresh Look: Once clean, your redwood might appear a bit darker or even have some black spots. Don’t fret! This is where a wood brightener, often containing oxalic acid, comes in. Mix it according to directions (again, typically 4 parts water to 1 part brightener) and apply it with your deck brush. This step is a game-changer; it neutralizes the cleaner, restores the wood’s natural, beautiful pink tones, and preps the fibres for optimal stain absorption.
- Final Rinse and Drying: Rinse the brightener off thoroughly with fresh water (again, a pressure washer can be used gently). Now comes the hardest part: patience! Your deck must be completely dry before you apply any stain. This typically takes 2–3 days, depending on weather conditions like humidity and temperature. Moisture left in the wood can prevent the stain from properly absorbing, leading to adhesion issues and premature peeling.
When Can You Stain Redwood?
A common question is, “can you stain redwood right away?” For new redwood decks, the answer is usually no. New redwood contains natural tannins and moisture from the milling process that need time to leach out. It’s generally recommended to let a new redwood deck weather for at least 3 months. During this period, the wood will darken and might even turn grey, but don’t panic – the cleaning and brightening steps mentioned above will bring back its vibrant colour, and these are all part of our deck restoration services.
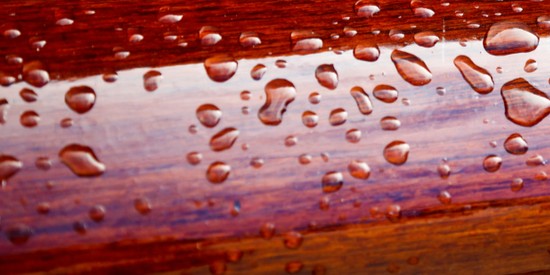
How do you know if your redwood deck is truly ready for staining? Perform the “water beading test.” Simply drip some fresh water onto the deck surface. If the water soaks in quickly, your deck is ready. If it beads up on the surface, the wood isn’t porous enough yet, and you’ll need to wait longer. Staining a deck that isn’t ready can lead to the stain sitting on the surface like a film, which will inevitably peel and flake.
Finding the Best Deck Stain for Redwood
Selecting the best deck stain for redwood is a pivotal decision that impacts both the aesthetics and protection of your deck. You’ll want a high-quality product specifically recommended for exterior wood. Here are the main types you’ll encounter:
- Transparent Deck Stain: This clear finish allows the full natural beauty of the wood grain to shine through. It won’t crack or peel but offers the least UV protection, meaning the wood might still grey over time. It’s ideal if you want a truly natural look and are prepared for more frequent reapplication.
- Semi-Transparent Deck Stain: This is often considered the best redwood stain for those who want to enhance the natural grain while providing robust protection. It contains some pigment, which offers excellent UV protection and moisture resistance, making it a popular choice for staining redwood deck projects. While it offers fewer colour options than solids, it hides minor imperfections without completely obscuring the wood.
- Solid Deck Stain: This type of stain fully covers the wood grain, similar to paint, and comes in a wide array of colours. It offers maximum protection and can hide significant imperfections. However, solid stains can crack and peel over time, especially with heavy foot traffic, and may require more intensive prep when it’s time to re-stain.
When looking for the best redwood stain and sealer, prioritize finishes that are penetrating rather than film-forming. Penetrating stains absorb into the wood fibres, offering deeper protection and preventing cracking and peeling. Look for formulations that include UV inhibitors (to prevent sun damage and greying) and mildewcides (to inhibit fungal growth, especially in damp, shaded areas).
You’ll also decide between oil-based and water-based finishes:
- Oil-Based Deck Stain: Known for deep penetration, oil-based stains don’t form a surface film, meaning they typically won’t crack or peel. They are generally easy to apply. However, they take longer to dry and require more regular cleaning. If your old finish absorbs water and isn’t peeling, it’s likely oil-based, and you can usually clean and re-apply a new oil-based stain.
- Water-Based Deck Stain: These dry quickly and form a protective film. They offer good durability but are more prone to cracking and peeling, especially if not applied correctly. If your old finish is cracking, peeling, or repels water, it’s likely water-based and will require a stripper and extensive sanding for removal before applying a new finish.
Many experts consider a high-quality semi-transparent, oil-based penetrating stain to be the best redwood deck stain for both beauty and long-lasting protection. It offers a beautiful stained redwood look that truly highlights the wood’s inherent character.
If you’re still weighing your options for the perfect material for you, be sure to explore our guide to the best decking materials and their pros and cons.
How to Perfectly Stain Redwood Deck
You’ve prepped, you’ve chosen your redwood stain. Now for the satisfying part: application!
First, pick the right day. The ideal temperature for redwood staining is between 15–25°C (60–80°F), out of direct sunlight, and with no rain forecasted for at least 12–24 hours after you finish. Too hot or too much direct sun can cause the stain to dry too quickly, leading to lap marks.
For application, you can use a brush, roller, or sprayer. Many pros swear by a deck brush applicator for its ability to push the stain into the wood fibres. Always stir your stain well before and periodically during use to ensure consistent colour and distribution of solids.
Follow these steps for a beautiful, redwood stained deck:
- Start with Railings: If your deck has railings, stain them first before moving to the main deck floor. This prevents drips onto your newly stained deck boards.
- The “Brush On, Brush Off” Technique: This is critical for preventing issues like peeling or tackiness. Apply a thin, even coat of stain. Then, immediately go back over the area with your brush to remove any excess stain that hasn’t absorbed within 10–15 minutes. The goal is to allow the wood to absorb only what it can, rather than leaving a film on the surface. If you see pools or shiny spots, brush them out.
- The Two-Board Rule (and exceptions): To avoid unsightly lap marks (where wet stain overlaps dry stain), work on only two boards at a time, along their entire length. Start at one end, brush on and brush off for the full length of those two boards, then move to the next pair. This allows you to maintain a wet edge and achieve a seamless finish. For very narrow boards (around 90mm), you might be able to tackle 3–4 at once. As you approach the very last few boards, you might also need to widen your working area to 3–4 boards to ensure you have enough space to walk without stepping on freshly applied stain.
- No Over-Application: This cannot be stressed enough. Over-applying stain is a leading cause of premature failure, leading to a sticky surface that attracts dirt or a film that cracks and peels. Less is often more with stain on redwood.
After application, allow at least 24–48 hours for the stain to fully dry before allowing foot traffic. Always consult the manufacturer’s instructions for specific drying times and reapplication guidelines.
Redwood Deck Ongoing Maintenance
Even the best redwood deck sealer or stain won’t last forever. How long redwood decks last depend on regular maintenance as the magic formula to ensure a fantastic deck for 10-plus years.
- Routine Cleaning: Keep your deck free of leaves, dirt, and debris. A simple rinse with a garden hose can do wonders for day-to-day surface dirt. For more stubborn grime, use a mild detergent and a stiff brush.
- Reapplication Schedule: If your deck gets a fair amount of sun, clean and reseal/restain it every other year. For shaded decks, you might stretch this to every three years, especially if mildew isn’t an issue. Slightly tinted stains generally last longer than completely clear finishes.
- Check for Nail Stains: Choose high-quality, hot-dipped galvanized nails when building or repairing your deck, as lower-quality nails can react with the wood and cause unsightly black stains in your beautiful redwood stained surface.
- Avoid Incompatible Materials: When touching up or reapplying, always ensure your new product is compatible with the existing finish. Mixing incompatible materials can lead to finish failures.
Transform Your Outdoor Space
Staining a redwood deck is an investment in your home’s beauty and longevity. By following these steps – from meticulous cleaning and proper product selection to careful application and ongoing redwood deck maintenance – you’ll protect your deck from the elements and keep it looking its best. The satisfaction of seeing your stained redwood boards come alive with rich colour is truly rewarding.
If you have questions or prefer professional assistance, don’t hesitate to reach out to siding and deck contractors at Sidex. We can ensure your deck gets the utmost attention and care it deserves.